
eSpeedMovie Start is unwanted extension which holds a lot of deception. This adware often use the bundling method, so it can be delivered into the PC even if users did not install it with intent. This approach is the most typical used by crooks to easily spread adware like eSpeedMovie Start.
eSpeedMovie Start allows attacker not only to ruin your PC, but also to risk your privacy. Various ads from this shady program are more of a way to lead you to harmful web pages and paid links. It observed that eSpeedMovie Start performs some unlikely functions. It replaces your start-up settings. It traces your online history like web sites you visited, search queries, and pointing out user�s line of interest. This adware can also steal sensitive information of PC users.
This malware tend to gain more online profit. eSpeedMovie Start shows loads of online ads based on your product preferences. That way, it may increase chances that you click ads from eSpeedMovie Start. But mind you that clicking ads may leads you to acquire added issue. It allows you to redirect to unwanted web site. Simple click to look like safe ads may lead you to download and install adware, malware, and other computer threats.
Once you figured out the presence of eSpeedMovie Start, you should have to remove it promptly. Serious problems may come out when you let it running. Bear in mind that though it was not a virus, all issues you bump into and anything strange are caused by this adware. More so, getting rid of eSpeedMovie Start is the only way to return the normal performance of your system.

What is eSpeedMovie Start?
eSpeedMovie Start is a browser hijacker. It enters your PC using the software bundling method and hijacks the settings of the browsers. It hijacks the homepage, new tab, and default search engine. Whenever you open your browser, you see its default page. If you try to search something on your browser, it records your search query and then redirects you to other search engines for results. Apart from the search query, it also records your IP address, location, browsing history, and some hardware & software information.
All this collected information is sold to third-party clients, who may use it for marketing or other activities such as identity theft. eSpeedMovie Start is a severe risk to your privacy. We advise you to remove it from your PC right now. Follow the below instructions to remove it.
When the eSpeedMovie Start browser hijacker is installed on a device, common symptoms include:
- Changing the web browser’s default homepage to eSpeedMovie Start
- Changing the browser’s search provider and built-in search box to eSpeedMovie Start
- Ability to modify the ‘new tab’ functionality to launch the modified search portal page
- Loads into the web browser via the eSpeedCheck extension or add-on
Always opt for the custom/advanced installation mode and deselect anything other than the actual program, especially recommended software that you don't need. In short, you should not install suspicious software.
How to remove eSpeedMovie Start redirect (Virus Removal Guide)
Please perform all the steps in the correct order. If you have any questions or doubt at any point, comment down and we will try to assist you.
To remove the eSpeedMovie Start redirect, follow these steps:
- STEP 1: Uninstall eSpeedCheck from Windows
- STEP 2: Use MalwareFox to remove eSpeedMovie Start redirect
- STEP 3: Use HitmanPro to scan for malware and unwanted programs
- STEP 4: Reset the browser settings to remove eSpeedMovie Start
STEP 1 : Uninstall eSpeedCheck from Windows
In this first step, we will try to identify and remove any malicious program that might be installed on your computer.
-
Go to “Programs and Features”.
Windows 10
- On the Start menu, type Control Panel in the Cortana search box and then select “Control Panel” from the results.

- When the “Control Panel” window opens click on the “Uninstall a program” option under “Programs” category.

Windows 8
Right-click on the Start button and select “Programs and Features”. You will directly reach to the list the of programs installed.
- If there is no Programs and Features in the Start menu, then type “programs and features” into the search bar at the bottom of the Start window, then click the “Programs and Features” result.
- If you don’t see the a Start button, you are likely running Windows 8 instead of Windows 8.1. So, press the Windows key + X to open the menu instead and select “Programs and Features”.
Windows 7
- Click on Start, then click on “Control Panel”.
 If you don’t see “Control Panel” here, type control panel into the search bar at the bottom of the Start window, then click the “Control Panel” result.
 - Once you see the “Control Panel”, click on “ Uninstall a Program” from the Programs category.

- On the Start menu, type Control Panel in the Cortana search box and then select “Control Panel” from the results.
-
Find the malicious program and uninstall it.
Now you will see the list of all installed programs in the PC, carefully observe every program and find eSpeedCheck, then select it, and click the “Uninstall” button.
Your PC may have different malicious program thus the name may not match. If you cannot find any unwanted malicious programs on your PC, then you can skip to the next step -
Follow the screen instructions to uninstall the program.
In the next screen prompt, click on Yes, and then follow the prompts to uninstall the program.
Read all screen instructions carefully during installation, because malicious programs always try to trick you in hoping that you won’t read properly.


STEP 2: Use MalwareFox to remove eSpeedMovie Start adware
MalwareFox is antimalware that works on heuristic approach to detect and remove malware from your PC. It analyzes the malware signatures as well as their behaviour. If a program acts like a malware then MalwareFox blocks it right there. It is lightweight on your system resource and finishes the scan quickly.
Its not like I am recommending you to install a costly software to remove the malware. The MalwareFox subscription charges are fairly low. But that is for a fully featured program with real-time protection capabilities. The scanning works even with the free version, though you can try the MalwareFox Premium for 14 days. Also, you don't need to remove your current antivirus, MalwareFox will work effectively without any conflicts.
-
Download MalwareFox.
You can download MalwareFox by clicking the link below.
 MALWAREFOX DOWNLOAD LINK
(The above link will open a new page from where you can download MalwareFox) -
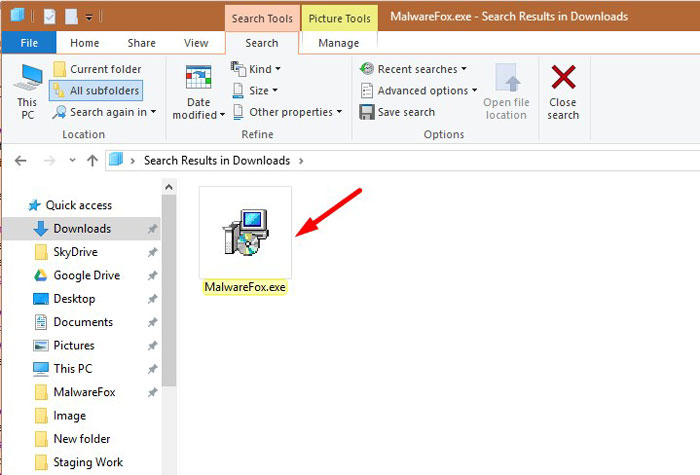
Double-click on the MalwareFox setup file.
Once the MalwareFox is downloaded, double click on MalwareFox.exe file to install it on your PC. The downloaded files are mostly saved to the Downloads folder.

You will see an User Account Control pop-up asking if you want to allow MalwareFox to make changes to your device. Click on “Yes” to proceed with the installation steps.

-
Follow the on-screen prompts to install MalwareFox.
First MalwareFox installer ask you to choose the language, select your preferend language and click on OK.

Then the MalwareFox installation Wizard appears, click on Next and follow the screen instructions to setup MalwareFox on your PC.

Once the installation is complete, MalwareFox will download the latest version and virus signatures from the server. Let it update.

-
Click on “Scan” Button.
To perform a system scan, click on the “Scan” button.

-
Wait for MalwareFox scan to complete.
MalwareFox is now scanning your computer for adware, pop-ups, browser hijackers, and other malicious programs. This process can take a few minutes, so you can do some other work while it is scanning your PC, don't worry the PC won't get slow during the scan.
-
Click on “Next”.
Once the scan has completed, you will see the list of detected threats on your PC. To remove the malware that MalwareFox has found, click on the “Next” button.
When the malware removal process is complete, you can close MalwareFox and continue with the rest of the instructions.


STEP 3: Use HitmanPro to scan for malware and unwanted programs
HitanPro works on unique cloud-based approach to detect the threats. You can use it as a second opinion malware scanner. HitmanPro also observe the behaviour active programs and checks the locations where malware normally resides. If there is a suspicious file then it upload thes file to cloud where it is scanned by Bitdefender and Kaspersky antivirus engines.
HitmanPro is available for a 30-days trail that lets you to clean the threats. After that you may need to purchase it which costs around $24.95 for 1 year single PC. If you won't upgrade then you can scan using the HitmanPro however it won't let you remove or quarntine the detected threat.
-
Download HitmanPro.
You can download HitmanPro by clicking the link.
 HITMANPRO DOWNLOAD LINK
(The above link will open a new web page from where you can download HitmanPro) -
Install HitmanPro.
When HitmanPro has finished downloading, double-click on “hitmanpro.exe” if you have 32-bit Windows or “hitmanpro_x64.exe” if you have 64-bit windows, to install this program on your PC. In most cases, downloaded files are saved to the Downloads folder.

Now you will see an User Account Control pop-up asking if you want to allow HitmanPro to make changes to your device. Click “Yes” to install it on your PC.

-
Follow the screen instructions.
When HitmanPro starts you will see the start screen as shown below. Click on the “Next” button to perform a system scan.


-
Wait for the HitmanPro scan to complete.
HitmanPro will now start scanning your PC for malware. This process may take a few minutes.

-
Click on “Next”.
Once HitmanPro finished the scan, you will see a list of all the malicious programs that it found in your system. Click on the “Next” button to remove the malware.

When the process is complete, you can close HitmanPro and continue with the rest of the instructions.


(OPTIONAL) STEP 5: Reset the browser to remove eSpeedMovie Start pop-up ads
If you are still seeing eSpeedMovie Start site on your browser, then you need to reset the web browser settings to their defaults. If your issue has been solved by the above methods, then there is no need to follow this step.
Google Chrome
-
Open Chrome’s “Settings” menu.
Click on Chrome’s main menu button, located in top right corner and looks like three vertical dots. Now click on “Settings”.

-
At the bottom, click “Advanced”.
You will see Chrome’s “Settings” in a new tab. Next, scroll down to the bottom and click on the “Advanced” button.

-
Under the section “Reset,” click “Reset”.
Now you will see Chrome’s advanced settings. Scroll down to the “Reset and clean up” section. Then click on the “Reset settings to their original defaults” button.

-
Confirm by clicking “Reset”.
Now you will see a confirmation dialog, detailing the components that will be restored to their default state should you continue on with the reset process. To confirm the reset action, click on the “Reset Settings” button.


Mozilla Firefox
-
Go to the “Help” menu.
Click on Firefox’s main menu button, located in the top right corner, represented by three horizontal lines. Then click on “Help“.

-
Click “Troubleshooting Information”.
Now click on “Troubleshooting Information“.
If you’re unable to access the “Help” menu, then you can type about:support in the address bar and press enter to directly open troubleshooting page.
-
Click on “Refresh Firefox”
Now click on the “Refresh Firefox” button which is on the upper-right corner of the “Troubleshooting Information” page.

-
Confirm.
Now you will see the confirmation message telling you the action you are about to take. Click on the “Refresh Firefox” button to confirm the action.

-
Click on “Finish”.
Firefox gets closed and its settings will reset. Then it will display the list with information that was imported. Now click on the “Finish“.


Internet Explorer
-
Go to “Internet Options”.
Open Internet Explorer browser, click on the gear icon in the top right part of the browser, now select “Internet Options“.

-
Go to “Advanced” tab, then click “Reset”
In the “Internet Options”, click on the “Advanced” tab, then select the “Reset” button.

-
Click on “Reset”.
In the “Reset Internet Explorer settings” window, click on the “Delete personal settings” checkbox, then click on the “Reset” button.

-
Click on “Close”.
Once the Internet Explorer completes all the action, click on the “Close” button.
Now you need to restart the Internet Explorer browser.


Microsoft Edge
-
Go to “Apps and Features”.
Right-click on the Start button and select “Apps and Features“. It will open the list of all installed programs.

-
Find Microsoft Edge from the list, then click “Advanced Options”.
You will see the list of all programs in your PC. Scroll through the list and locate “Microsoft Edge”, select it, and then click on the “Advanced options”.

-
Click on “Reset”.
Now you will see the “Advanced Options”. Find the “Reset” section, as shown in the picture below. Then click on the “Reset” button.


Your computer should now be clean, and you will not see the eSpeedMovie Start pop-up ads in your browser. If you are still facing problems while trying to remove eSpeedMovie Start adware then please comment down your problem. We will try to help you as much as possible.